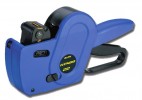
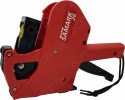
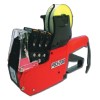
How to use price labellers. The complete guide to find out all the details
How can you use manual labellers? In our e-commerce website, we sell products which are extremely intuitive to use, such as double-sided tape or insulating tape.
But our online store also offers much more elaborate professional products, which require more initial information to be used the right way.
Among these are certainly manual labellers, also simply known as labellers: these are devices meant for manual use which, without involving any type of digital technology, make it possible to print custom labels to be applied on various products.
Manual price labellers are typically used in retail, but they can also be valuable for industrial labelling.
Today we will have a look at how to use price labellers step by step: we will outline how to correctly load the labels roll, how to set the characters to be printed on it, how to label products quickly and effectively and, finally, how to replace the ink (or the ink pad).
Enjoy reading!
How to load labels into the labeller
Loading a label roll into a manual labeller may be the most difficult step in the process of learning how to use the labeller itself.
But, no need to fret: if at first glance it might seem too difficult, you should keep in mind that by following the right instructions even changing the labels roll becomes easy and fast, so much so that it can be done in seconds.
How can you do it? As we know, labels are contained in special rolls. To change the roll, you have to open the appropriate flap (the round one) freeing the relevant opening.
You can then pull out the old roll, now emptied, and place the new on the central pin. At this point, you’ll need to open the side meant to extract labels from, which is typically located at the bottom or front of the labeller: by rotating the roll you can pull out the adhesive tape by about ten centimetres (3.9 in); you can then take this flap and insert it back into the labeller through the correct opening (a few centimetres away from the previous one).
Close the open flaps and press the trigger to start sliding the industrial double-sided adhesive tape, which will be pulled tight. And just like that, you’re done!
Set the print characters on a price labeller
Here is another key step in using the manual labeller: after inserting the roll, you may need to set the print characters which will be shown on the custom labels.
The manual mechanism allowing you to change the rolls is a descendant of the old movable characters printing presses, with some mechanism making their use easier. There are many types of price labellers, with one or more print rows, each with a variable number of alphanumeric characters available.
How to proceed? There are actually several mechanisms used by price labellers manufacturers: in most cases there is a dial allowing you to select the character to change and then a wheel to the side to slide the characters until you get to the desired one.
After customization, all you need to do is return the dial to the starting position, to begin printing your labels.
How to label with manual labellers
Price labellers are not limited to custom printing: they are designed to print adhesive labels to be placed directly on the products to be “marked” with sales prices, expiry dates, production dates, product codes, and so on. An incorrect, through widespread, use of them is printing the label, grabbing it with a fingertip and then sticking it on the product.
The fastest and most effective way to use this tool is to directly apply the label on the surface to be labelled, thus using a single hand.
How should you proceed? It is not difficult. With the roll loaded and pulled, and with the correct printing characters set with the dial, you will just have to hold the price labeller with one hand, placing the price gun on the product to be labelled.
At that point the handle will be activated: when you press down, the label is printed, and while you loosen the grip the label is dispensed: you will have to gently pull the price labeller towards you to deposit the label printed this way.
How to refill labeller ink
This is a manual price labeller, and therefore a device which needs ink to continue printing legible and well-defined labels. Periodically, it is, therefore, necessary to change the ink pad.
Don’t worry: even in this case it is a rather simple operation, with minimal differences between one model the another.
Proceed by identifying the compartment containing the ink pad, opening the relevant compartment flap.
Using a dry cloth or a piece of absorbent paper, you can first clean out any ink spills, then remove the used ink pad and easily replace it with the new one, making sure not to dirty up your fingers. For the sake of thoroughness, it should be noted that there are different ink pads for each type of price labeller (it is therefore necessary to ensure compatibility).
In the case of Sato price labellers for sale in our e-commerce website, there are permanent inks in black and red.


